The Problem

For the transport of frozen fish fillets I previously had a transport box insulated with Styrodur.
Unfrozen and welded in freezer bags, the fillets can be stacked in the freezer of the fishing camp space-saving and easy. But when they are repacked into the transport box, they fall apart. You don’t get the puzzle back together when you stack it into the transport box. The fillets now need a lot more space. So there is nothing left but to go with lots of air in between. This is not good for the cold energy balance of the transport.
The same work is then done again at home when repacking into the freezer.

The Idea

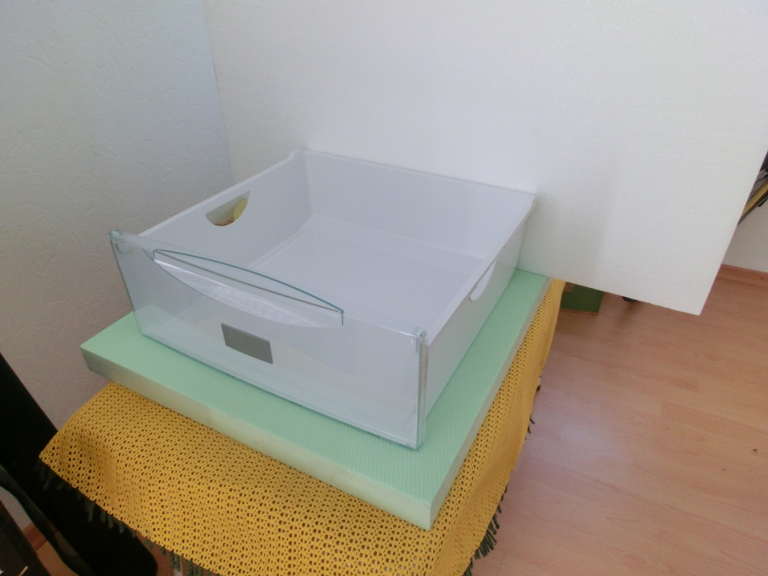
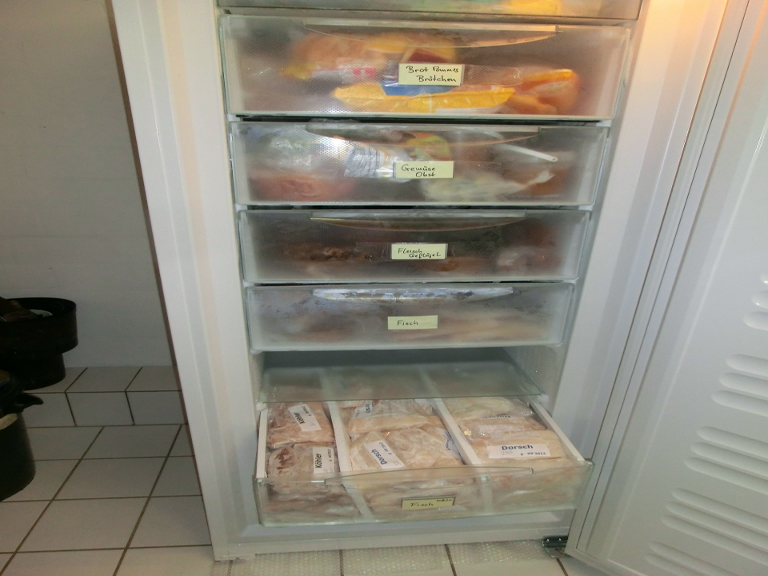
The idea is that a drawer of the freezer at home is converted with polystyrene.
Then you can already pack the fillets into the drawer in the freezer of the camp and the annoying and time- and space-consuming 2 times repackaging of the fillets is omitted.
I did not create a 100% accurate description. The whole thing is just a craft fritzen anyway. And everyone can do the whole thing better, and that’s a good thing. But I think the idea really comes close!

The Task

The drawer should:
– in Norway: taken out of the freezer – into the box
– at home: taken out of the box – into the freezer
– no repackaging of the fillets in Norway
– no repackaging of the fillets at home

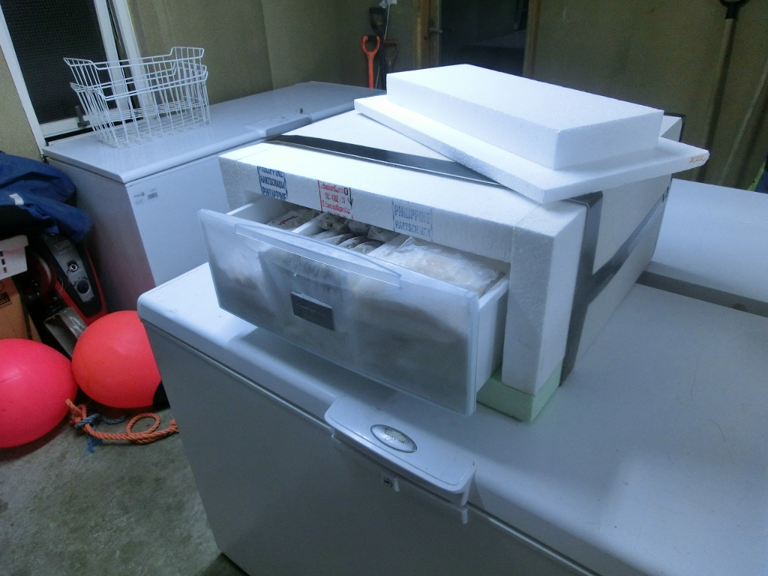
The solution

gut gefüllte Gefrierschublade in die selbstgebaute Fischtransportkiste schieben

Materials:

  • Polystyrene plates (WLG040) 50mm x 500mm x 1200mm (I still had)
  • 1 pc styrodur plate 40mm x 600mm x 1000mm (I still had)
  • Construction adhesive solvent-free, the simplest is good enough
  • 1 pcs. polystyrene plate 15mm thick for the lid 


One can also use only Styrodur, then the insulation and strength is higher, but the price too.


Polystyrene sheets with WLG030 are more suitable than WLG40!

1.

The polystyrene plates are cut to fit with a jigsaw. However, a cutting blade without saw teeth should be used, because with saw teeth one becomes “snowed in”. The sourness is not so easy to eliminate.
It is also not wrong to sacrifice 1-2 plates to practice cutting. It is important that the cut is right-angled and straight. All too easily the saw blade runs and the cutting edge becomes crooked or buckling. And then you don’t just get the thing glued right-angled.

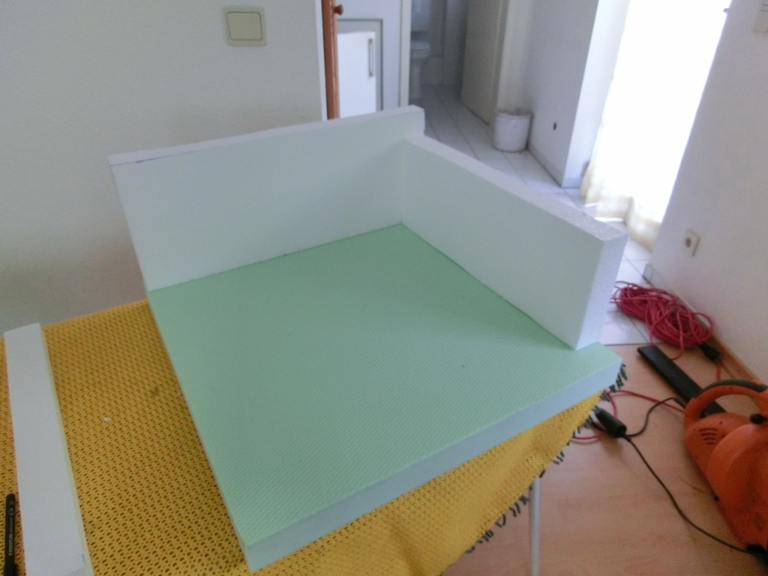
Baufortschritt "Bodenplatte" der selbstgebaute Fischtransportkiste

You can see the “floor plate” made of Styrodur. This is more stable than polystyrene and insulates better.
It is cut 50mm larger than the drawer on each side.

2.

The adhesive surfaces must lie flat on top of each other in order to keep the insulating capacity of the transport box as high as possible.

So: right-angled and smooth cuts are absolute important!

There are also devices that cut polystyrene plates with a hot wire. You can borrow it or have it cut by a professional.

Baufortschritt "Seitenplatten"1 der selbstgebaute Fischtransportkiste

The cut plates are glued bluntly to each other. It is important that the individual parts are marked so that they can always be put together correctly. After all, the whole thing is a highly valuable hand-made custom-made work and not a pop industrial assembly line product from China.

3.

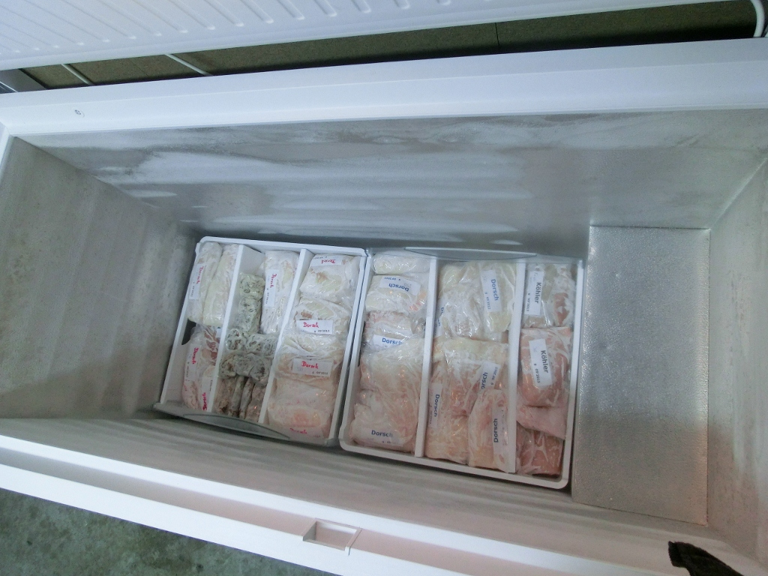
The freezer in Vik Brygge looks pretty empty. In both drawers 20kg of fillet are packed, two strips of 20mm polystyrene separate the fish varieties.
I don’t do that anymore, it’s as stocked as it gets caught.

unsere Gefrierschubladen aus dem Gefrierschrank hier in der Truhe im Camp

4.

Here is the finished box. It stands on the freezer of the camp Vik Brygge. The lid is on top.
To protect the polystyrene, cardboard is attached around it with adhesive strips. The drawer with the frozen fillet is not yet fully inserted.

gut gefüllte Gefrierschublade in die selbstgebaute Fischtransportkiste schieben

5.

The box is loaded out of the car at home after 42 hours.
The protective lid made of cardboard has been removed. The lid was still well glued.

The fillets are still frozen, as if they had just come out of the freezer.

Ankunft mit gefrorenem Fisch nach 3 Tagen mit selbstgebauten Fisch-Transportkisten

6. It worked!

  1. Simply get the drawer out of the freezer in Norway – into Box
  2. Out of the box at home – into the freezer

No repackaging in Norway – No repacking at home!

raus aus Kiste, rein in Gefrierschrank,- ganz einfach mit selbstgebauten Fisch-Transportkisten

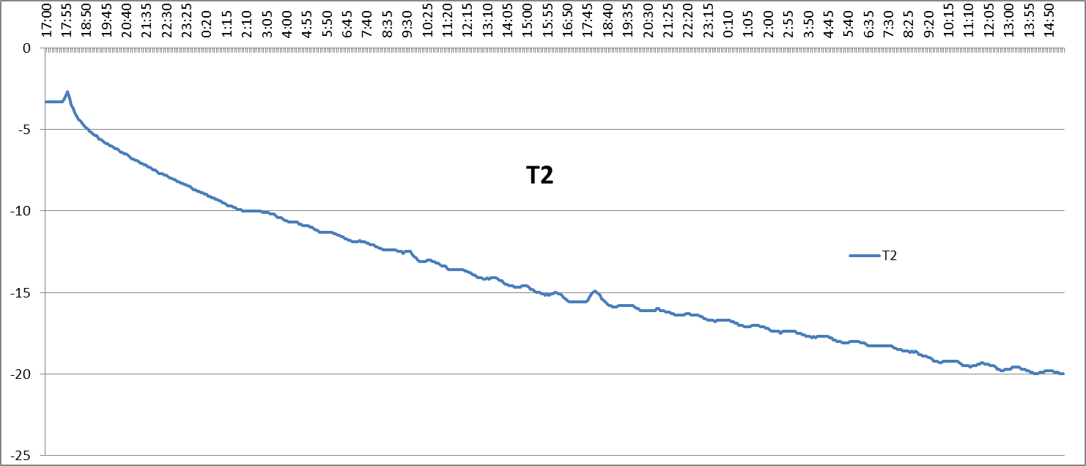
The temperature course of our return journey from SENJA

We have placed temperature sensors with data loggers in both boxes.
Normally we use simple 3-EUR temp indicators and the wire of the tempsensor is led out through the corners of the lid. This is very good for control on the road, it doesn’t need more.
We drove from Senja to Baden-Baden in 3 days. We wanted to know more about this in order to be able to plan more precisely for the future.

How is the transport?  

In our car (Volvo V50) we have taken a 1 cm thick plate of styrofoam with the dimensions 200x60cm as a backing for both boxes.
The boxes were laid one after the other, so that one can still observe the rear traffic via the central mirror. The boxes on top of each other would be better, from the isolation point of view.

On the boxes we put 20 pc. 0.5 Ltr. plastic bottles with frozen water (-20°C).
Above we put a fishing overall and a fishing suit. On top of this 2 duvets.

The temperature sensors were placed as follows:

– TI for the inside car temperature at the top of the luggage cover.
– T1 for the temperature directly on the boxes under the frozen plastic bottles.
– T2 for indoor temperature box 1
– T3 for indoor temperature box 2

Temperaturkurve über 3 Tage beri den selbstgebauten Fisch-Transportkisten

The large crease in the upper line T1 has the following backgraoud:
At 11.30 a.m. the temperature sensor disappears inexplicably from its position…
… all day the sendor layed directly on the boxes. In the evening at 19:15 we placed it back on top of the suits to measure the room temperature in the car again.

Comment on the diagram:

Start: Wednesday 19.09.2018, 05:10 | Arrival: Friday, 21.9.2018, 17:50
Duration: 2 1/2 days | or 60h:40min | or 2 days 12:40h

Temperaturmessung für die selbstgebauten Fisch-Transportkisten
Temperaturkurve über 3 Tage beri den selbstgebauten Fisch-Transportkisten

The drawer needed almost two days to freeze -20°C.

It will be similar when the fillets are frozen in the camp.
What is filled into the freezer on the last day before departure, cannot freeze properly.

I published the report in 2013 in a shorter form in the Norwegen-Angelforum.de.
The temp-measurements has been added.

Even today I use the same two boxes that we built back long time ago.


Norgish Greetings
Hans